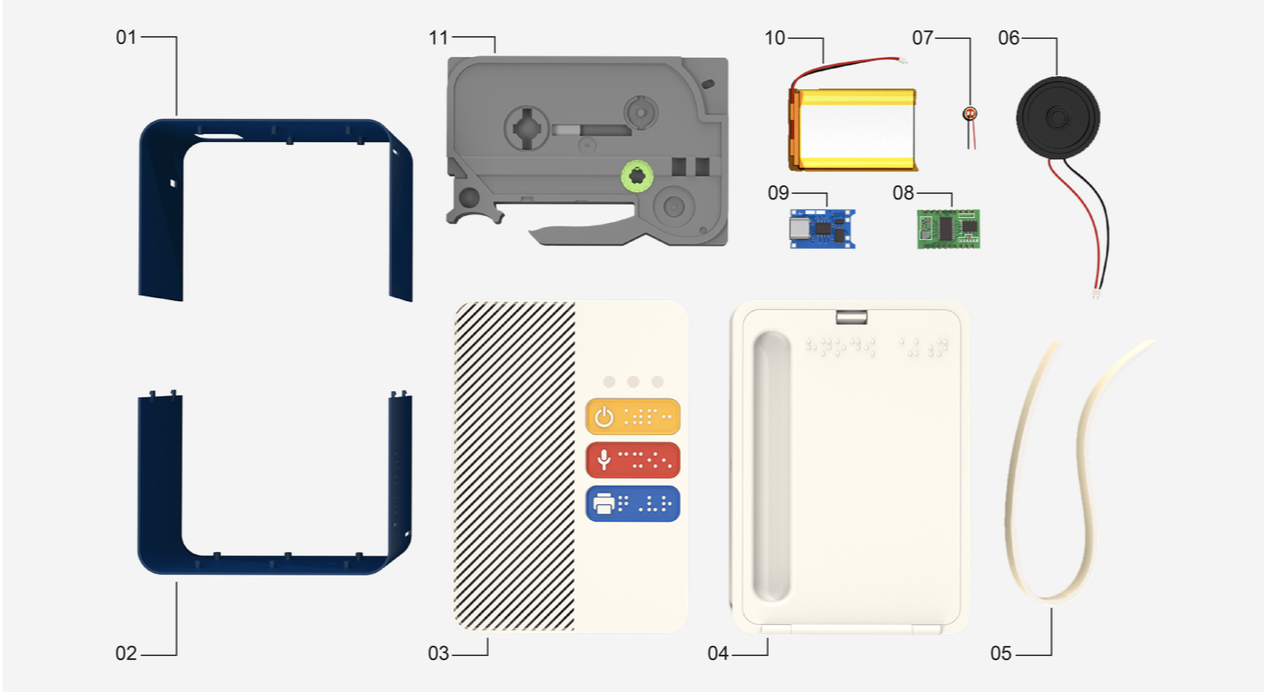
Braille Labeler
Braille Labeler
A braille label maker has been designed for the convenience of visually impaired individuals to use anytime and anywhere through voice recognition.

Research #1
Identified discomfort points related to kitchen products through interviews.
Interview
Conducted interviews with three visually impaired individuals.


* Participant information was omitted to respect privacy.
Needs
Identified needs from interviews.
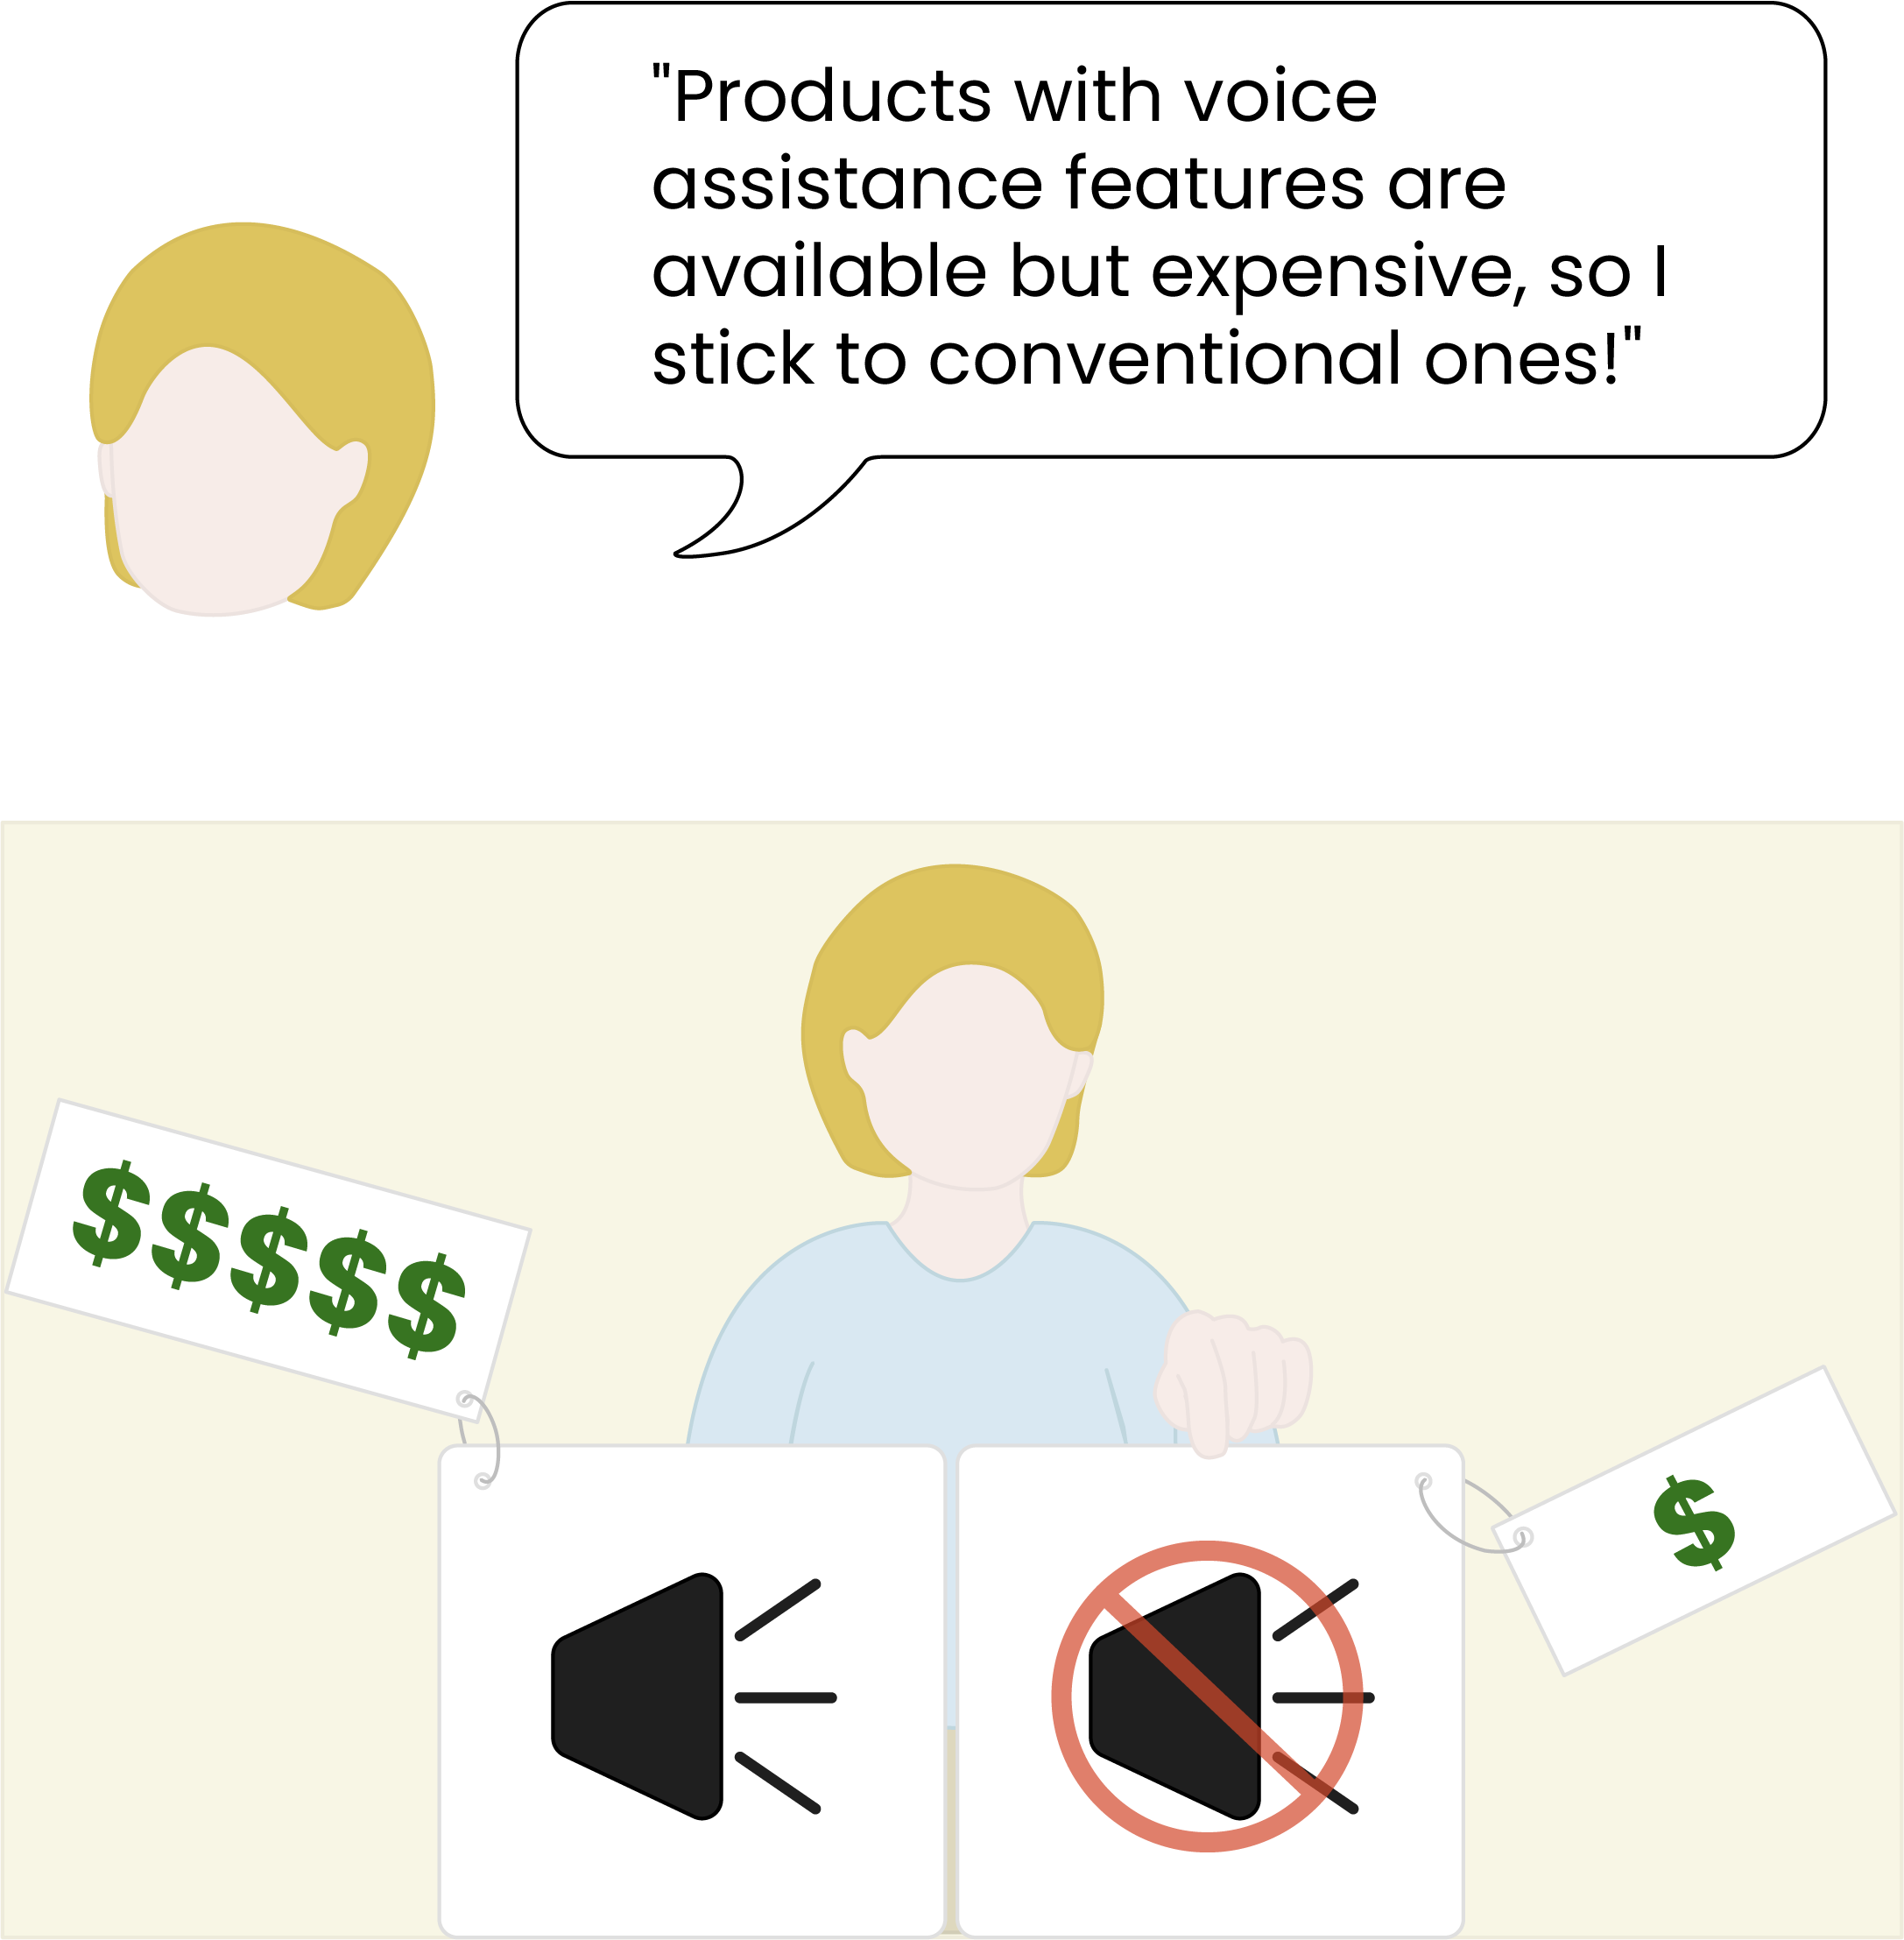
I want products with voice support and voice recognition capabilities.
I want to use Braille stickers for desired terms.
I need something to indicate touch-based buttons.
I prefer stickers that can be easily cut.
I prefer the convenience of portability for easy carrying.
Needs Keywords
#Voice Support/Recognition
#Braille Stickers
#Indication
Research #2
Prior to sketching, the components to be integrated inside the product were researched and then the product's size was determined.
Parts
The components intended for integration inside the product were researched, and appropriate sizes for each component were determined.


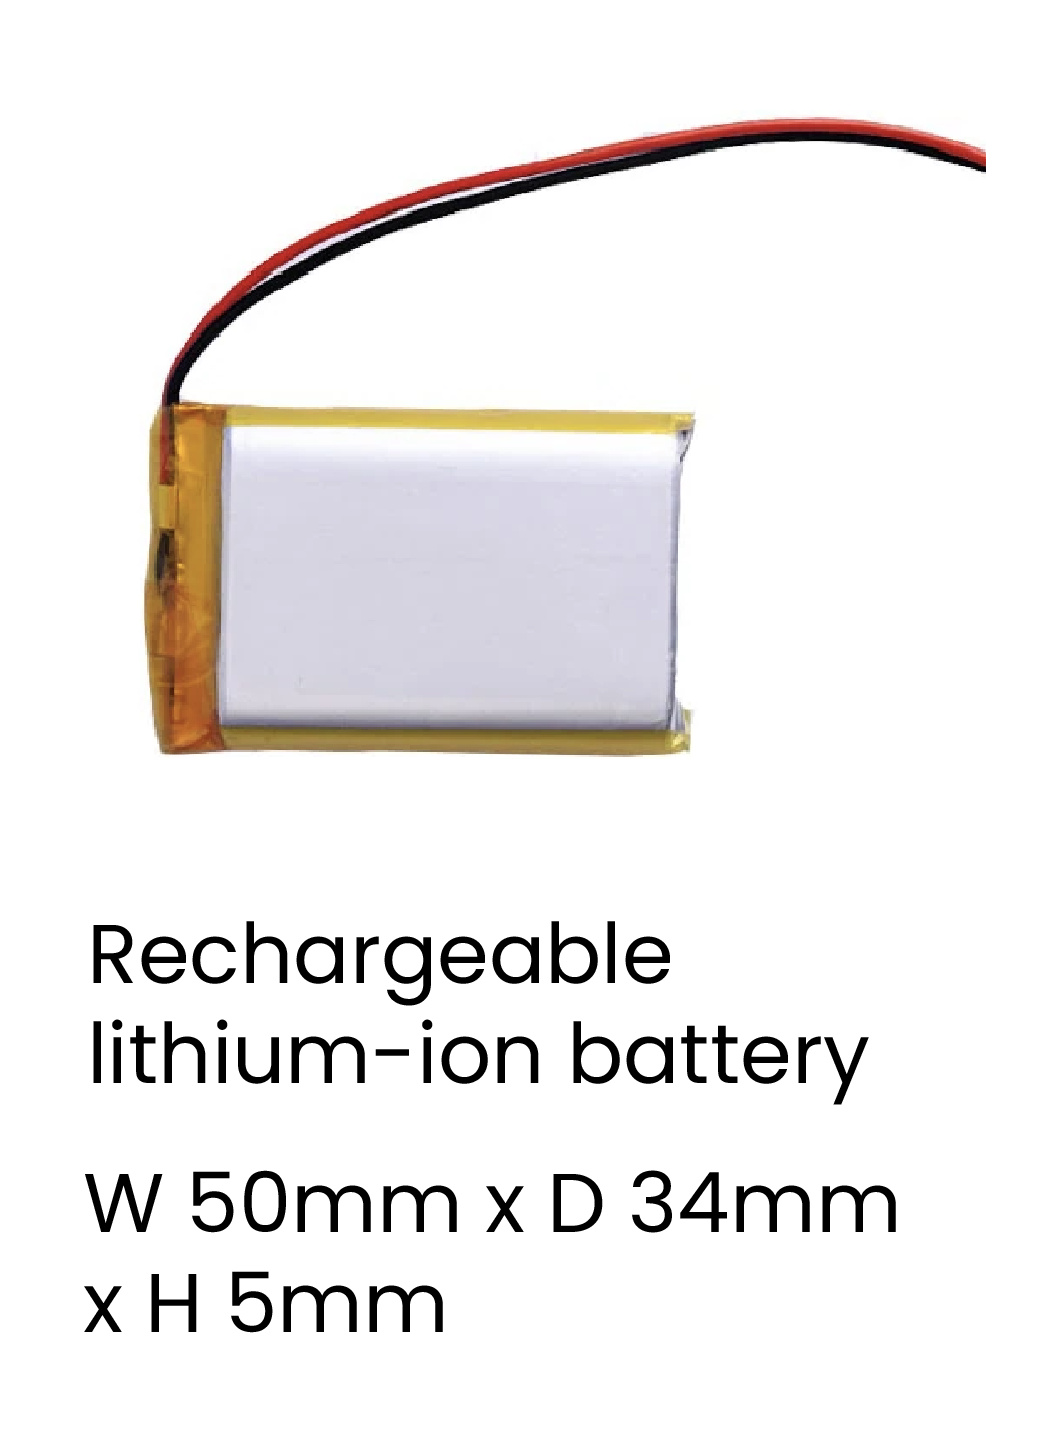


Organizing Internal Space
Based on the collected data, the interior of the product was sketched out.

Determining The Right Size
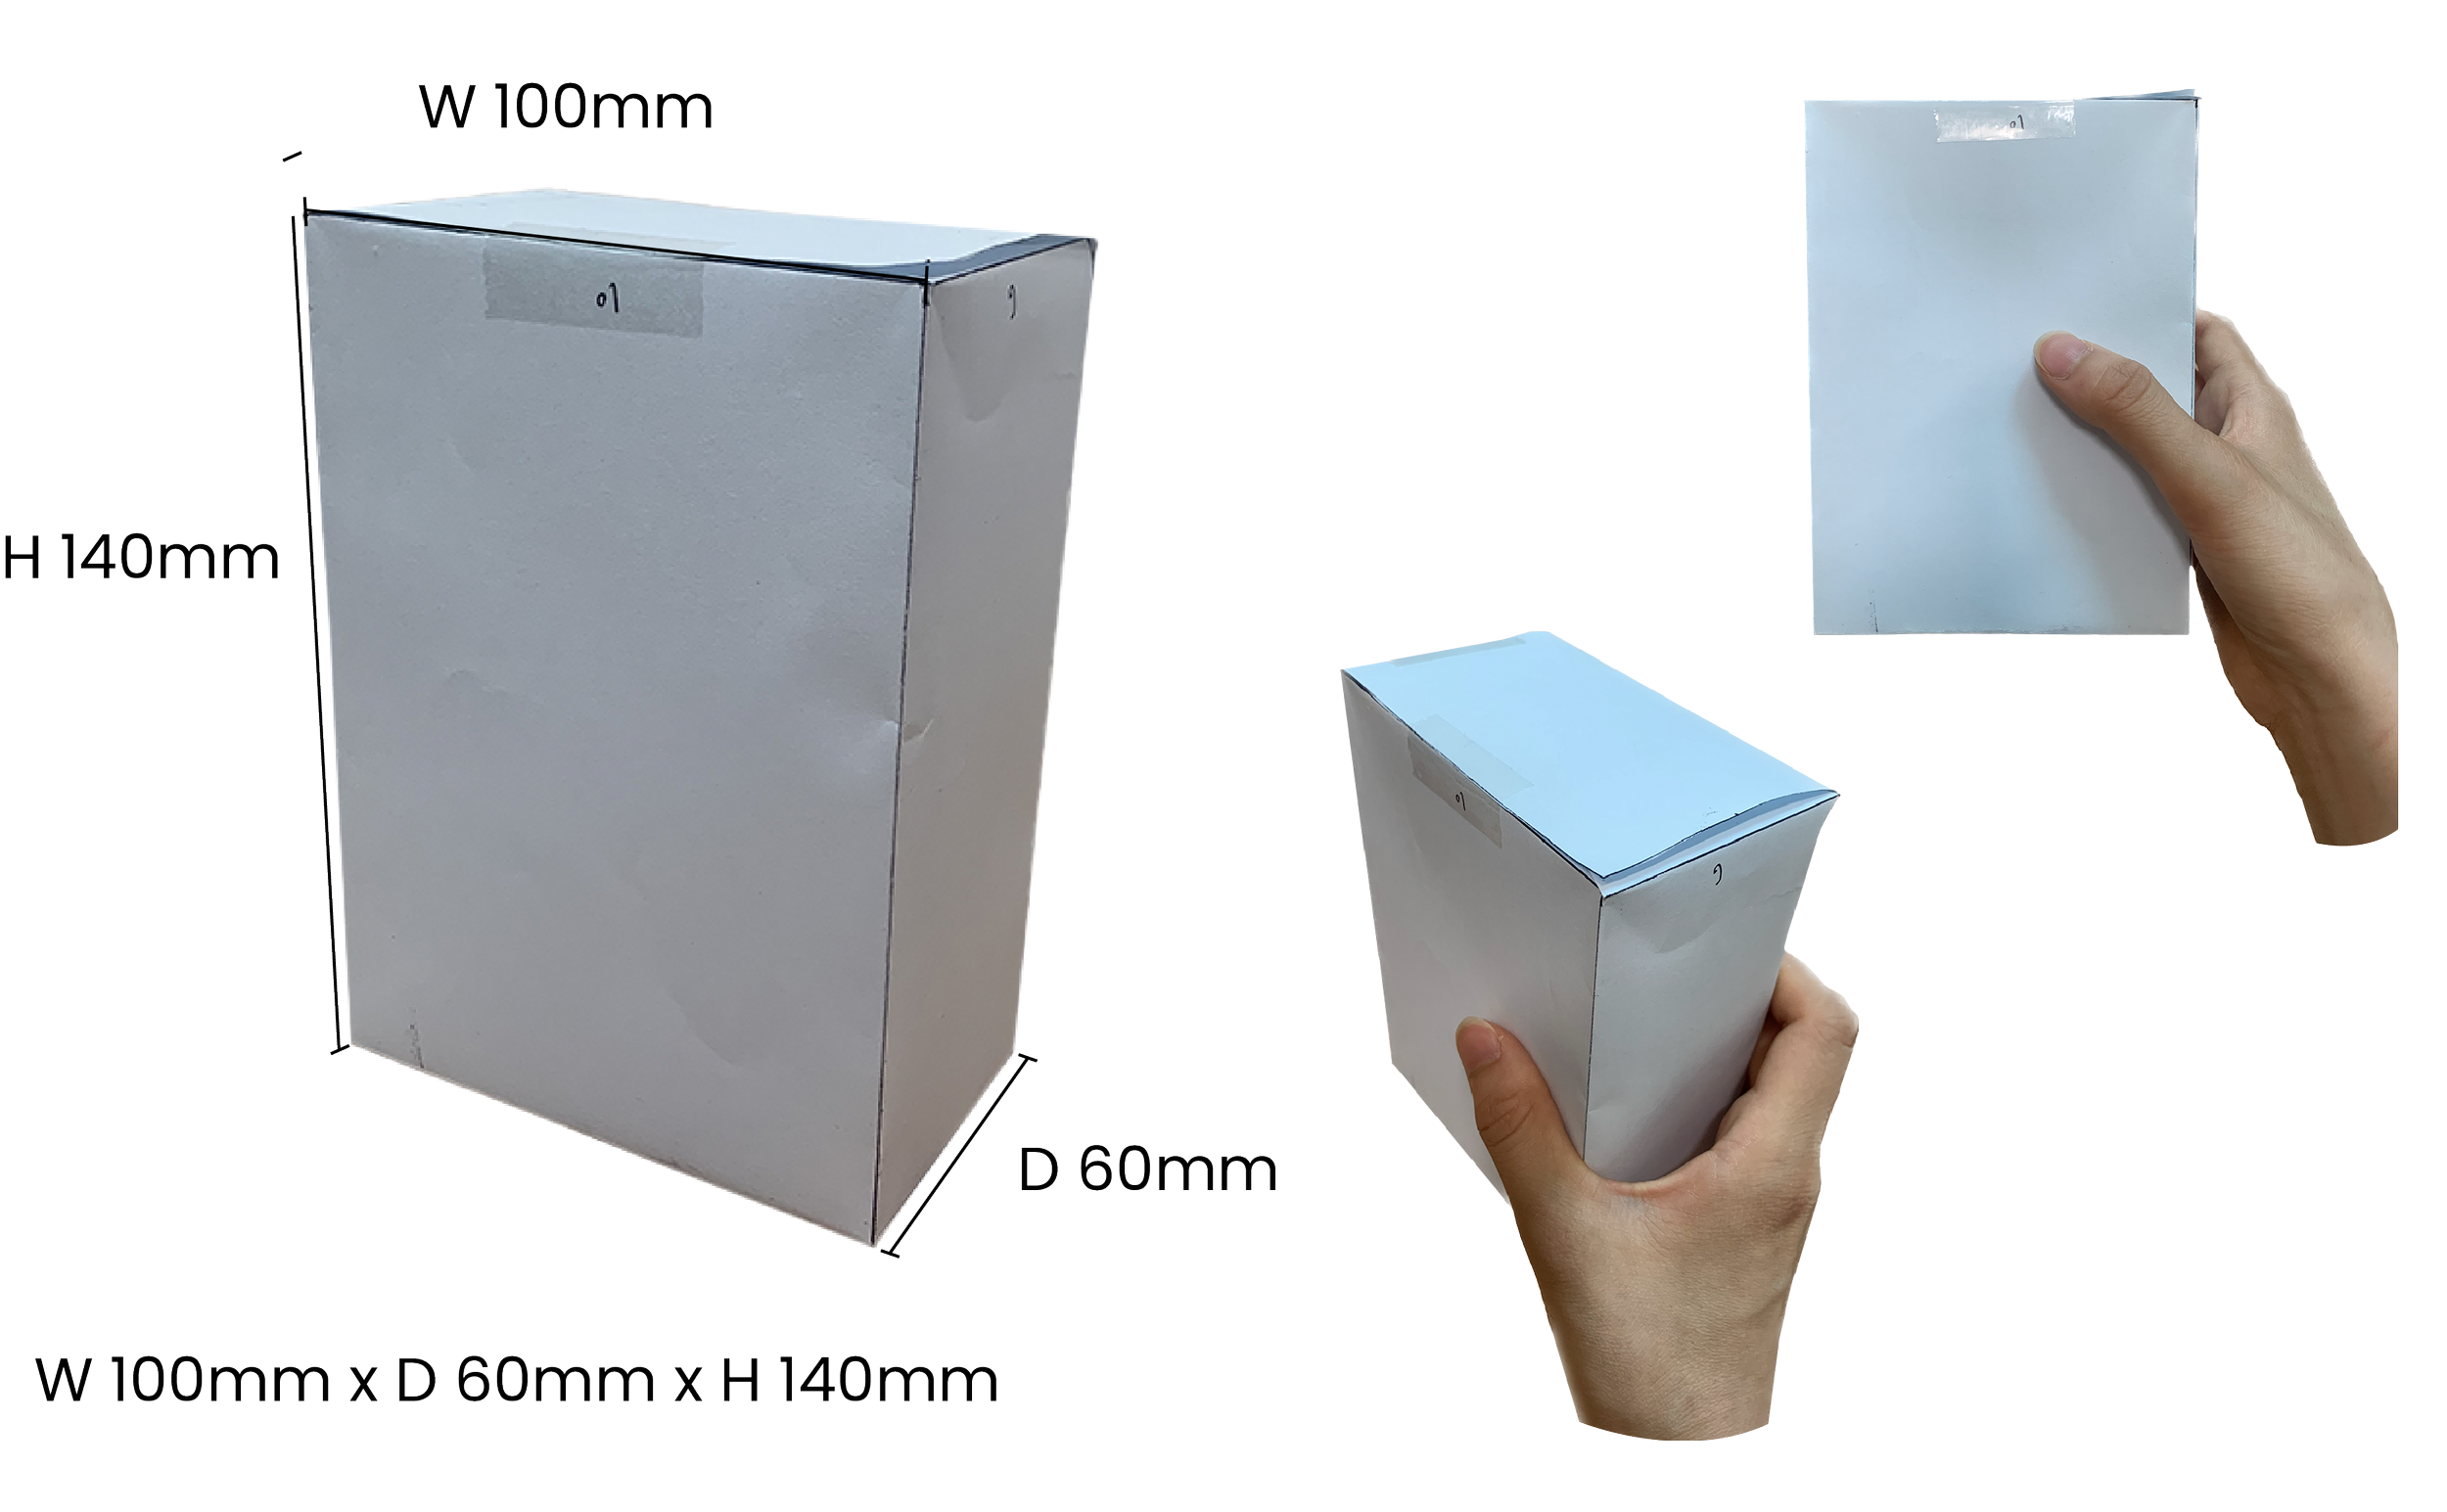
By configuring the interior, the suitable size for the product was established, and a simple prototype was created using paper.
Ideation Sketch

Taking into consideration various key elements, diverse sketches were drawn to explore different forms.
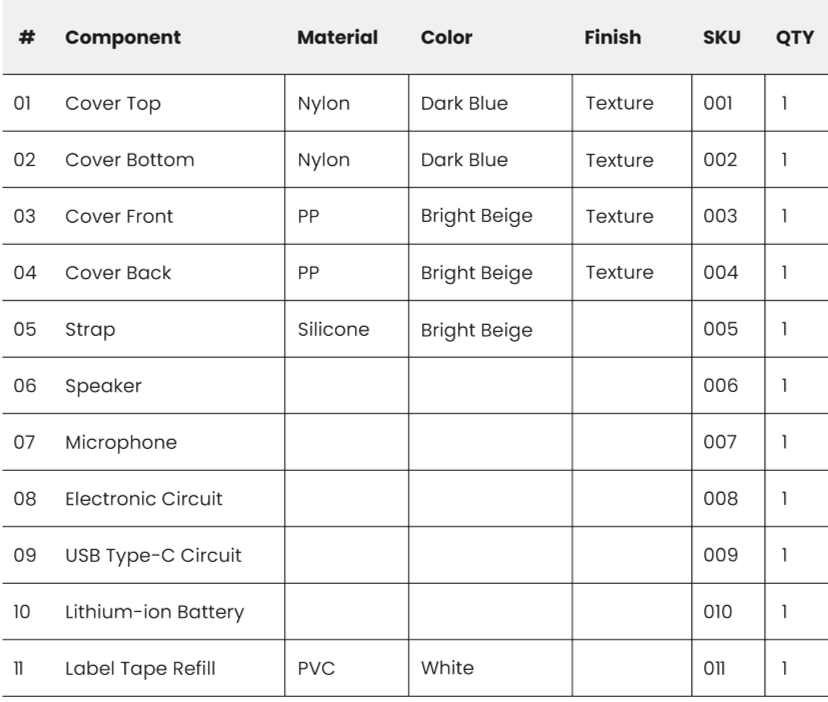
Final Design

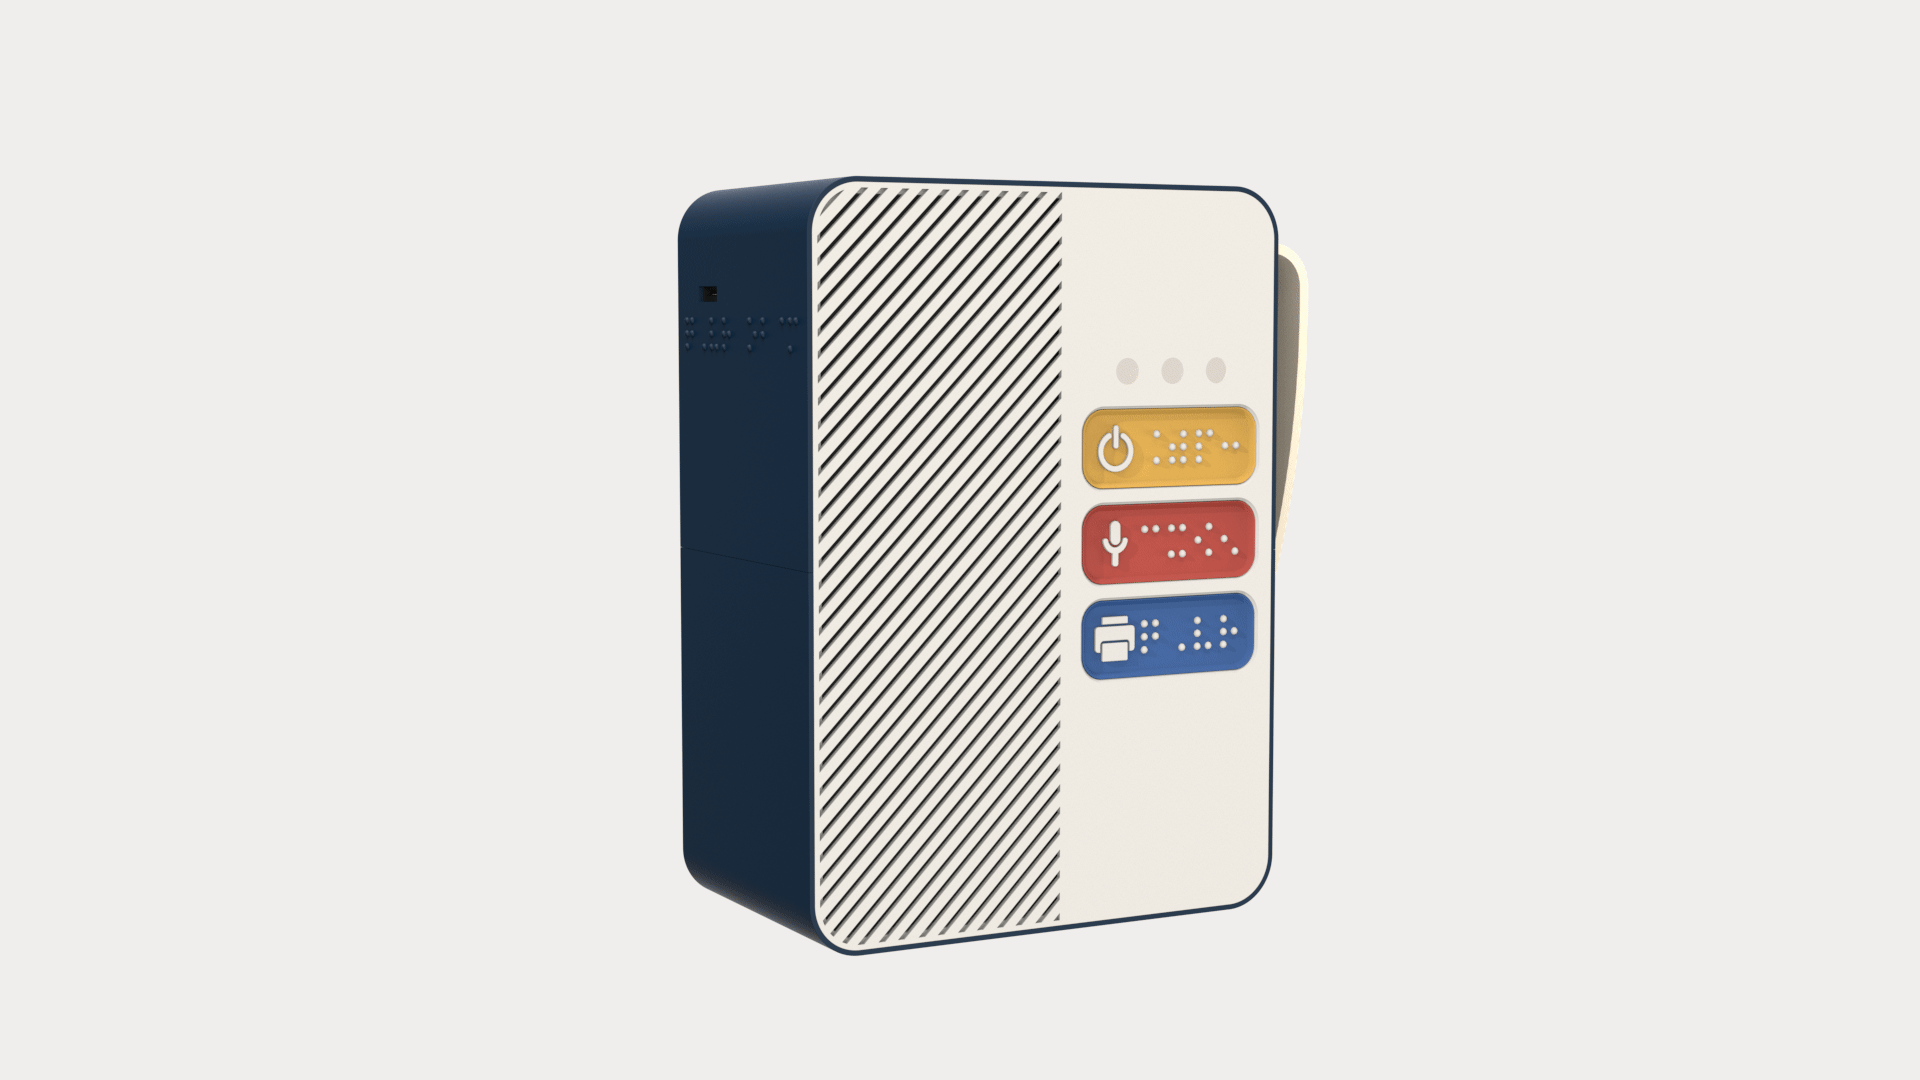
Detail
This section showcases the elements that compose the product.


5. Speaker
Equipped with a speaker and microphone, it produces sound and records audio.
6. Charging
This can be charged using a USB Type-C connection.
9. Record Button
This button allows the user to input the desired language through speech.
10. Print Button
This enables the execution of printing.
11. Print Entry
This is the entrance where the sticker comes out after being printed.
2. Label Tape
This is a place to insert refill tape.
1. Cutting Button
The button allows users to cut out the stickers.
4. Handle Strap
This is a diagonal-shaped handle that provides a stable grip for users to hold the product comfortably.
3. Handle
Designed to be ergonomically comfortable for users to grip and utilize.
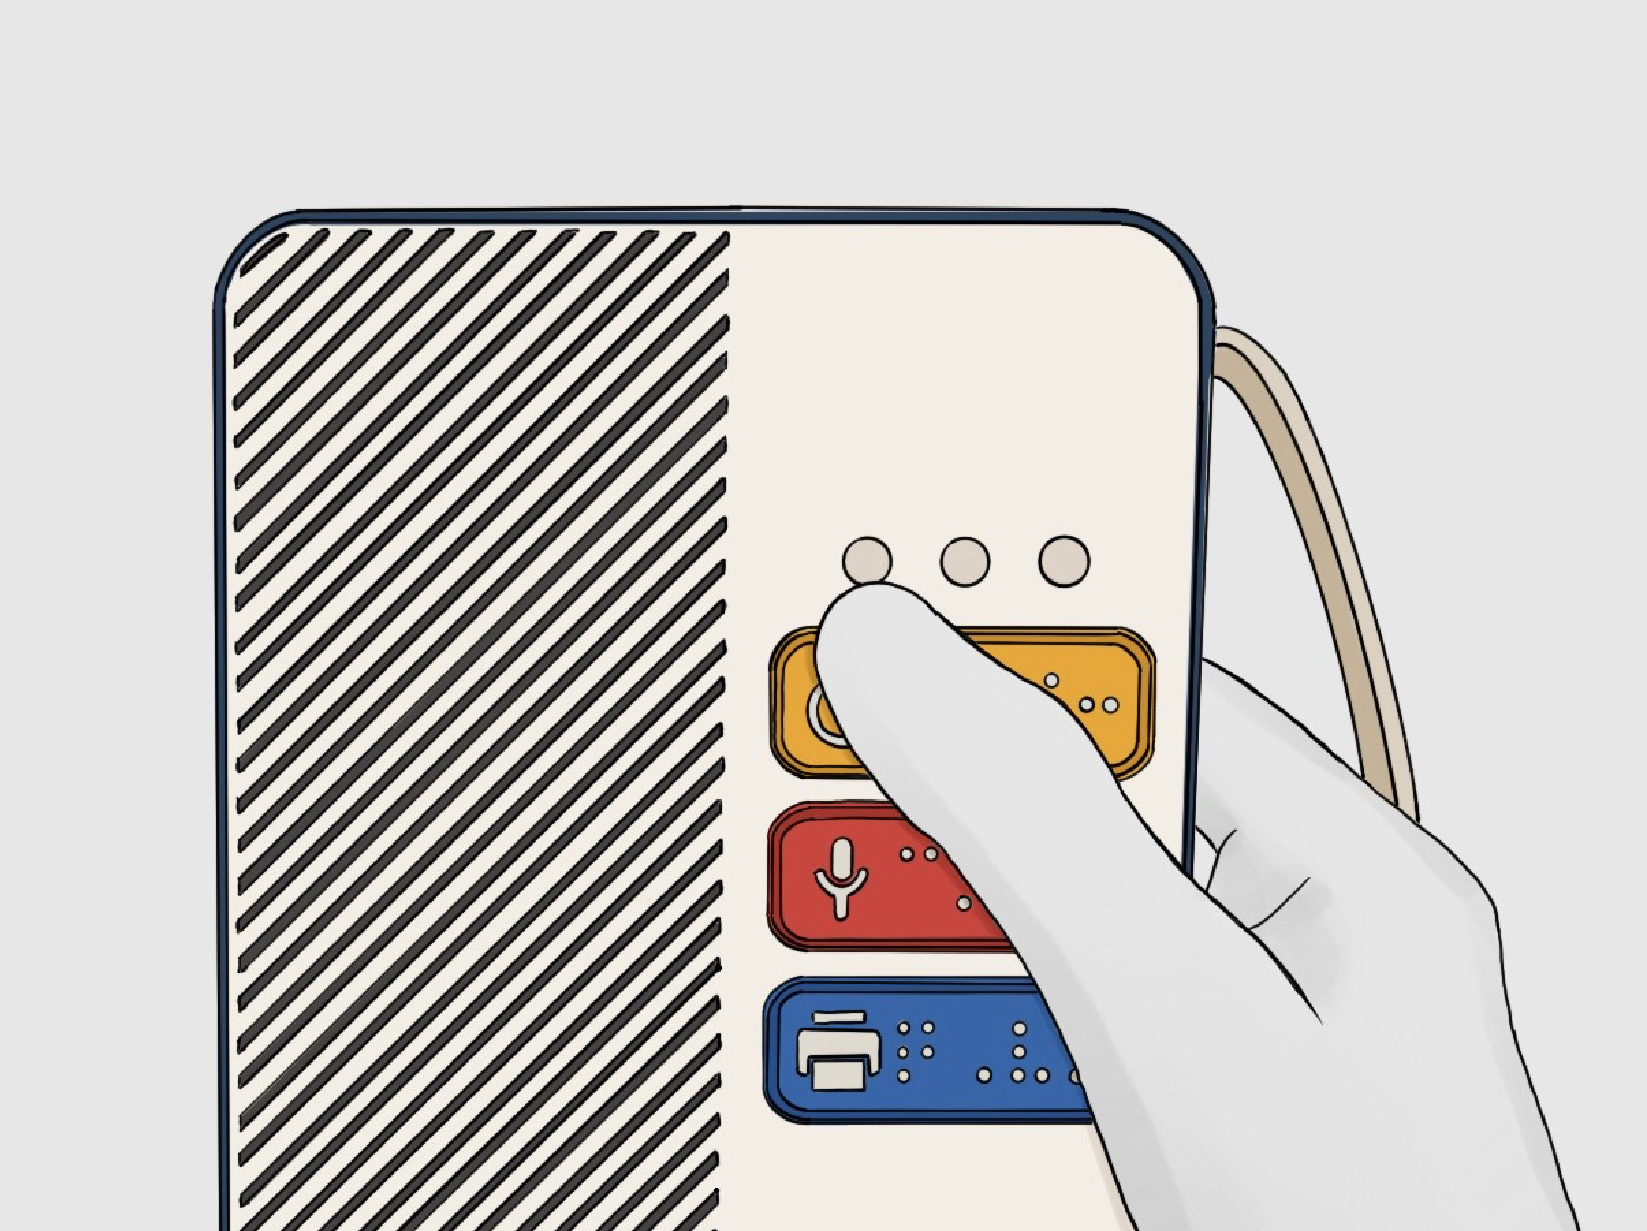
8. Power Button
This button allows the user to input the desired language through speech.
7. Battery Indicator
It indicates the remaining battery level.
User Scenario
Demonstrates how users can interact with the device.

3
4


5
6

When the machine dispenses a sticker
When a sticker is dispensed, the machine emits a "diriring" sound to notify the user.
Cutting the dispensed sticker
To cut the dispensed sticker, the user presses the cutting button located on the top of the product downwards.
7
8

Turning off the machine
The user presses and holds the power button for a longer duration to turn off the machine.
Replacing the label sheet
To replace the label sheet, the user opens the lid on the back of the product by pulling it downward.

1

2
Speaking the word
By briefly pressing the power button, the machine powers on. A "ding" sound confirms the device is turned on.
Turning on the machine
By briefly pressing the power button, the machine powers on. A "ding" sound confirms the device is turned on.
Confirming and printing the word
The machine repeats the word mentioned by the user for confirmation. If correct, the user can press the print button to execute the printing.
If the word is incorrect
If the machine mispronounces the word, the user can press the record button again until it is pronounced correctly, then proceed to execute the printing.